An important part of keeping your Shark vacuum cleaner working effectively is ensuring there are no blockages. The primary cause of blockages is a buildup of dirt on the filters, which need to be cleaned regularly.
You may think about what makes shark vacuum cleaner filters so important.
The filters on a vacuum cleaner remove dust and allergens from the surfaces of your home. This helps to keep not only your home free of dust and dirt but also you and your family healthy.
If you don’t keep the filters clean, the buildup will cause poor performance from your cleaner. So, it is important for you to clean all filters as often as required.
But in order to perform this function, you need to know how to clean shark vacuum filter for your shark model.
In this article, we go through the shark vacuum filter cleaning instructions for a Shark rotator, navigator, and rocket. We discuss shark HEPA filter cleaning and the steps for a clean foam filter on shark vacuum.
The first step for most Shark vacuum cleaners
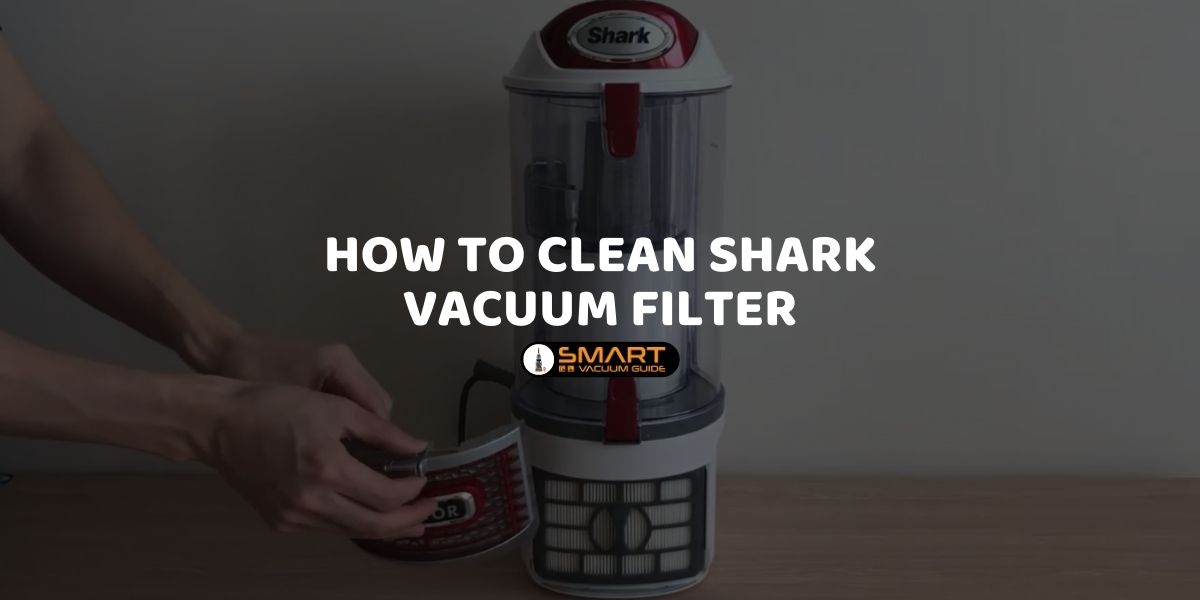
To begin with cleaning the filters on the Shark rotator, navigator, or rocket, you need to remove the dust canister from the machine and empty it. This can usually be done by using two fingers to lift the canister release buttons.
Once the dust canister has been removed and cleaned, you can access the main filters and move on to the cleaning steps for your Shark model.
Shark Rotator
For those who need points on shark rotator filter cleaning, the process starts by removing the filters and following the instructions for cleaning them.
- Directly under the canister, you will see the first filter with a plastic tab on top of the filter for you to pull out
- Underneath is the second filter; it is a round flat filter with a pull tab for you to pull it out of the machine
- The third filter is by the rotator sign above the head, you will see a clip to open the compartment for you to pull out the shark vacuum HEPA filter.
Once you have removed all the filters from your shark rotator vacuum, your next step is to clean them.
Shark Rotator cleaning instructions
- Walk over to the garbage bin gently wipe off or brush off any loose and large pieces of dirt
- Take the first filter, twist and pull the foam filter from the plastic holder
- Go to the washbasin and turn on the cold water
- Place the foam filter under the water in order to wet it completely
- Squeeze out the water to remove most of the dirt from the filter
- Apply a small amount of dish soap or laundry detergent to the foam filter and massage in until nice and soapy
- Rinse under the running water until you have removed all signs of soap
- Twist and squeeze out the excess water, but be careful not to tear the foam
- Leave on the washbasin top to air dry for 24-48 hours
- Wipe off the plastic part with a damp paper towel and the filter housing on the inside of the vacuum cleaner
- Take the second flat round filter and also gently wash as you did with the first filter
- Gently tap off or brush off any debris to clean the third filter. This is the one you removed from the front of the clean.
If while cleaning the filters and they tear or break, or you cannot wait for them to dry. Replacement filters for the shark rotator are easy to buy.
With the shark navigator filter cleaning, we provide you with the method for how to clean shark navigator lift away filters.
- Underneath the dust container of the Shark Navigator lift the foam filter out by the pull tab
- Underneath the foam filter, lift the felt filter out by also using the pull tab
- Gently hand wash both filters by placing them under cold running water only
- To access the hepa filter, you will see a press button at the bottom of the hepa filter cover that enables you to remove the cover
- Pull the hepa filter out and you can begin cleaning shark vacuum hepa filter by hand washing it in cold water.
Remember: with the shark lift away filter cleaning, it is important to give all wet filters at least twenty-four hours drying time before inserting them back in the cleaner.
Shark Rocket
Before you begin with your shark rocket vacuum filter cleaning, disconnect the hose from the vacuum and remove the dirt cup.
The has three filters, which should be maintained regularly basis. To remove and clean all three, follow these steps.
- Look at the top of the cleaner, you will find a cover with a lift lever to remove the cover
- Underneath the cover, you will find and remove the foam filter and the felt filter
- At the bottom of the shark rocket vacuum cleaner by the power cord is another push button lever for removing the cover and a smaller filter
- Tap the excess dirt over the garbage bin
- Rinse all three filters under cold running water until the water runs clear
- Gently squeeze water out of filters
- Place one side for a day to allow for drying
- Reassemble the vacuum cleaner
Now that you know the shark vacuum filter placement, how to remove and clean the filters, your next question might be how often should you perform the shark filter cleaning process.
When and how many times a year should you clean the different filters?
For different filters of different shark models, the intervals between cleaning may vary.
For Example, for the Shark rotator and navigator, the recommended time for cleaning the filters is every 3 months. But with the Shark rocket, many have advised cleaning the filters on a monthly basis.
There are also other factors that you should consider before deciding on when to clean the filters
- How often do you use the vacuum cleaner? – If you only vacuum once a week or whether you vacuum more often
- Consider the volume of dirt – consider the task, whether it is light vacuuming with little dirt or heavy cleaning with a lot of dirt
- How your vacuum is performing – if your vacuum is showing signs of a reduction in suction power, pickup problem, or has an unpleasant odor. It is time to clean your shark vacuum and the filters.
The process for how to clean shark vacuum filter is quite simple. However, with the different Shark models, removing and cleaning the different filters may differ a little. Follow the easy instructions we have provided you with or you can also check the user manual for further advice.
Loading…
40 MINUTES
ESTIMATED TIME DESIGNING AND UPLOADING THIS ARTICLE
6 HOURS 30 MINUTES
ESTIMATED TIME RESEARCHING AND WRITING THIS ARTICLE
You Might Also Like:
[tcb_post_list query=”{‘paged’:1,’filter’:’related’,’related’:|{|’category’|}|,’orderby’:’date’,’order’:’DESC’,’posts_per_page’:’10’,’offset’:’1′,’no_posts_text’:’There are no posts to display.’,’exclude_current_post’:|{||}|,’queried_object’:{‘ID’:439,’post_author’:’3′,’post_type’:’post’}}” type=”list” columns-d=”1″ columns-t=”1″ columns-m=”1″ vertical-space-d=”15″ horizontal-space-d=”30″ ct=”post_list-44441″ ct-name=”Image and text 16″ tcb-elem-type=”post_list” pagination-type=”load_more” pages_near_current=”2″ css=”tve-u-1790b1e7287″ vertical-space-t=”30″ element-name=”Post List” article-tcb_hover_state_parent=”” vertical-space-m=”15″ total_post_count=”64″ total_sticky_count=”0″ posts_per_page=”10″ featured-content=”0″ no_posts_text=”” disabled-links=”0″ featured-list=”tve-u-171ad711190″ article-shortcode=”tcb_post_list” class=” article-tcb_hover_state_parent=” article-shortcode=’tcb_post_list’ ][tcb_post_list_dynamic_style]@media (min-width: 300px){[].tcb-post-list #post-[tcb_the_id] []{background-image: url(“[tcb_featured_image_url size=large]”) !important;}[].tcb-post-list #post-[tcb_the_id] []:hover []{background-image: linear-gradient(rgba(0, 143, 255, 0.1), rgba(0, 143, 255, 0.1)), url(“[tcb_featured_image_url size=large]”) !important;}}[/tcb_post_list_dynamic_style][tcb_post_title css=’tve-u-1790b1e729d’ link=’1′ rel=’0′ target=’0′ inline=’1′ static-link='{“className”:””,”href”:”https://www.smartvacuumguide.com/how-to-clean-shark-vacuum-hose/”,”title”:”How to Clean Shark Vacuum Hose”,”data-css”:”tve-u-1790b1e729d”,”class”:””}’ link-css-attr=”tve-u-1790b1e729d”]
[tcb_post_published_date css=” date-format=’F j, Y’ date-format-select=’F j, Y’ link=’1′ rel=’0′ show-time=’0′ target=’0′ time-format=” time-format-select=’g:i a’ type=’published’ inline=’1′ static-link='{“className”:””,”href”:”https://www.smartvacuumguide.com/2021/04/”,”title”:”April 26, 2021 “,”class”:””}’]
[tcb_post_content size=’words’ read_more=’….Continue Reading’ words=’23’ css=’tve-u-1790b1e7290′][/tcb_post_list]Load More- How to Change Belt on Shark Vacuum - June 21, 2021
- Shark Vacuum Brush Roll Indicator Light Not on - June 21, 2021
- Shark Vacuum Not Turning on - June 21, 2021