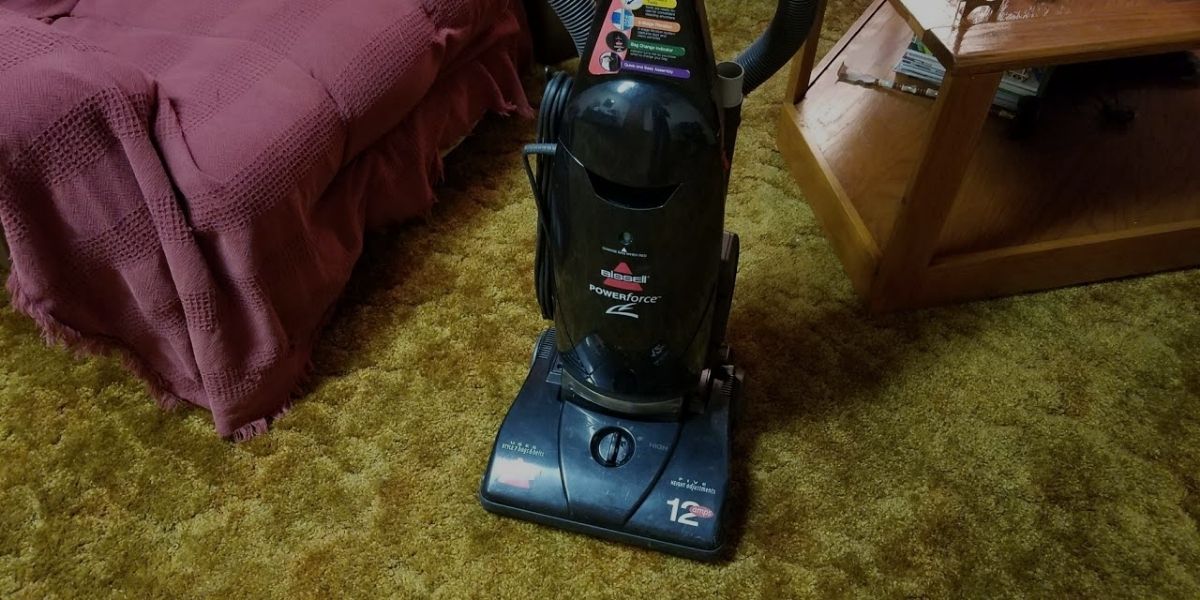
Is your Bissell vacuum cleaner flinging debris across the room with every stroke?
If true, then it is time to perform a little more maintenance than just emptying the dirt collection container. It is time to give your cleaner a good so it can do its job and work efficiently again.
Before we begin with the simple way for how to clean a Bissell vacuum, make sure that your vacuum is unplugged from the power source. Also, make sure you have gone through the manual for your model Bissell vacuum cleaner. The manual offers tips for the best way to perform maintenance on your type of machine.
Find a suitable area for your cleaning task
Look for an open area either on the floor or on a tabletop where you can perform the task of cleaning your Bissell vacuum. Lay down a garbage bag or an old sheet, as there will be dust and debris that you will need to remove from the inside of your vacuum cleaner.
Gather some tools and cleaning items
Having the tools and cleaning items that you need close by makes the task a lot easier to do. Things that you may need:
- Garbage bin
- Dust cloths
- A mild detergent
- Lukewarm water in a container or use a washbasin
- A screwdriver
- Scissors
Taking the Bissell vacuum cleaner apart
Before you panic, the parts that you will remove from your vacuum are parts that are meant to be removed for you to clean. These parts include the dirt collection container, the filters, and the brush roll.
Remove and empty the dirt collection container
If you are brand new to Bissell vacuum cleaners and want to know how to empty a Bissell vacuum. Don’t worry it is easy, we teach you how with these easy steps:
- Check that the machine is not plugged into the power source.
- Remove the dirt collection container by pressing the button on top of the handle to release it.
- Hold the dirt container over the garbage bin and press the lid release button to empty and then close the lid.
- Place the dirt collection container back in position on the machine if there is no need for a check and clean of the filters.
Wash the Bissell filters at least once per month
The filters are a big and crucial part of how to clean a Bissell vacuum cleaner. Dirty filters affect the performance of any vacuum cleaner. Clogged filters not only reduce the suction power but also overwork the motor, causing it to eventually burn out.
The next thing you should learn is how to clean Bissell vacuum filters. Most filters are easy to remove, clean and many are washable such as the two of the three Bissell cleanview helix filters.
The washable filters are the pre-motor filters at the bottom of the dirt collection container. To access them twist the filter counterclockwise, lift out, and separate the foam filter and the pleated circular which are both washable. The other washable small pre-motor filter is also located underneath the dirt container. It is inside what looks like a small piece of pipe sticking out that you can pull out with your fingers.
However, the post-motor filter cannot be washed. For a Power force helix, it is located on the front of the vacuum just underneath the dirt container. To get to it, open the door, pull the filter out and check the filter for dirt or damages. If dirty, tap the debris off in the garbage bin and return it to the vacuum cleaner. If it is damaged you will need to replace the filter by going to the Bissell website and look for a Bissell cleanview filter replacement.
For the Bissell cleanview multi-cyclonic filters, press the release button on top of the dirt collection container to release the container. Then open the container’s lid by lifting the filter hatch and pulling the lid up. You will see a sponge filter that is the washable pre-motor filter.
The post-motor filter is also located in the front of your vacuum cleaner below the dirt tank and above the height change control. To open, push down the latch and pull the door out, then grab the tab on the filter and pull it out. This filter is not washable and can only be cleaned by shaking the debris off and replacing it.
Another thing that you might wonder about is how to wash vacuum filters. Wash the filter in lukewarm water with a detergent that is mild, rinse, squeeze out, and leave to dry before returning them to the cleaner.
Remove and clean the vacuum’s rotating brush
For this step, you will need to lay the vacuum flat and upside down to see the brush roll bracket. Remove the screws holding the bracket in place with the screwdriver and put them in a safe place.
Remove the bracket and pull the rotating brush out, be sure to unhook the belt from the brush roller. Clean off the loose debris from the bristles and cut free any tangled hair by using the scissors.
Using the cloth, wipe off dust in the brush housing, and before replacing the belt on the rotating brush, check the belt for signs of wear and tear.
If there are no damages and all is clean, replace the rotating brush, belt, and then the bracket back into place.
Wipe dust off the exterior
The last step to having a clean Bissell vacuum cleaner is to wipe the dust off the exterior of your vacuum with a damp cloth.
So, we can agree that learning how to clean a Bissell vacuum is easy if you follow the steps we have provided for you. Choose the best area to work, gather the items you need, and clean the dirt collection container, the filters, and the rotating brush. Once the different parts are clean, your Bissell vacuum will be as good as the day you bought it.
29 MINUTES
ESTIMATED TIME DESIGNING AND UPLOADING THIS ARTICLE
6 HOURS 25 MINUTES
ESTIMATED TIME RESEARCHING AND WRITING THIS ARTICLE
You Might Also Like:
[tcb_post_list query=”{‘paged’:1,’filter’:’related’,’related’:|{|’category’|}|,’orderby’:’date’,’order’:’DESC’,’posts_per_page’:’8′,’offset’:’1′,’no_posts_text’:’There are no posts to display.’,’exclude_current_post’:|{||}|,’queried_object’:{‘ID’:439,’post_author’:’3′,’post_type’:’post’}}” type=”list” columns-d=”1″ columns-t=”1″ columns-m=”1″ vertical-space-d=”15″ horizontal-space-d=”30″ ct=”post_list-44441″ ct-name=”Image and text 16″ tcb-elem-type=”post_list” pagination-type=”load_more” pages_near_current=”2″ css=”tve-u-174f2f9187b” vertical-space-t=”30″ element-name=”Post List” article-tcb_hover_state_parent=”” vertical-space-m=”15″ total_post_count=”60″ total_sticky_count=”0″ posts_per_page=”8″ featured-content=”0″ no_posts_text=”” disabled-links=”0″ featured-list=”tve-u-171ad711190″ article-shortcode=”tcb_post_list” class=” article-tcb_hover_state_parent=” article-shortcode=’tcb_post_list’ ][tcb_post_list_dynamic_style]@media (min-width: 300px){[].tcb-post-list #post-[tcb_the_id] []{background-image: url(“[tcb_featured_image_url size=large]”) !important;}[].tcb-post-list #post-[tcb_the_id] []:hover []{background-image: linear-gradient(rgba(0, 143, 255, 0.1), rgba(0, 143, 255, 0.1)), url(“[tcb_featured_image_url size=large]”) !important;}}[/tcb_post_list_dynamic_style][tcb_post_title css=’tve-u-174f2f91895′ link=’1′ rel=’0′ target=’0′ inline=’1′ static-link='{“className”:”tve-froala”,”href”:”https://www.smartvacuumguide.com/how-to-clean-shark-vacuum-hose/”,”title”:”How to Clean Shark Vacuum Hose”,”data-css”:”tve-u-174f2f91895″,”class”:”tve-froala”}’ link-css-attr=”tve-u-174f2f91895″]
[tcb_post_published_date css=” date-format=’F j, Y’ date-format-select=’F j, Y’ link=’1′ rel=’0′ show-time=’0′ target=’0′ time-format=” time-format-select=’g:i a’ type=’published’ inline=’1′ static-link='{“className”:””,”href”:”https://www.smartvacuumguide.com/2021/04/”,”title”:”April 26, 2021 “,”class”:””}’]
[tcb_post_content size=’words’ read_more=’….Continue Reading’ words=’23’ css=’tve-u-174f2f91884′][/tcb_post_list][tcb_pagination data-list=’tve-u-174f2f9187b’ data-type=’load_more’]Load More[/tcb_pagination]Load More- How to Change Belt on Shark Vacuum - June 21, 2021
- Shark Vacuum Brush Roll Indicator Light Not on - June 21, 2021
- Shark Vacuum Not Turning on - June 21, 2021

